
In issue 102 of White Dwarf there is an excellent article about how to get the best out of painting shields and banners. I am sure that it was highly inspirational in its day, and it remains so today. When I first started out painting shields for my Realm of Chaos campaigns several years ago I knew that freehand shields were going to be essential to the old school look I was going to go for with the paint jobs.
Trouble was, I was utterly useless at painting shields, and had been for twenty years. But with a little determination and a little practice I managed to develop the skill. To be honest, I was surprise quite how quickly I was able to master (if that is the correct word) the technique. One thing that really helped me get to grips with painting horrible little faces was the step by step guide to the classic ogre face by Mr John Blanche himself.
Have a quick read of the article below to see what I mean.
 |
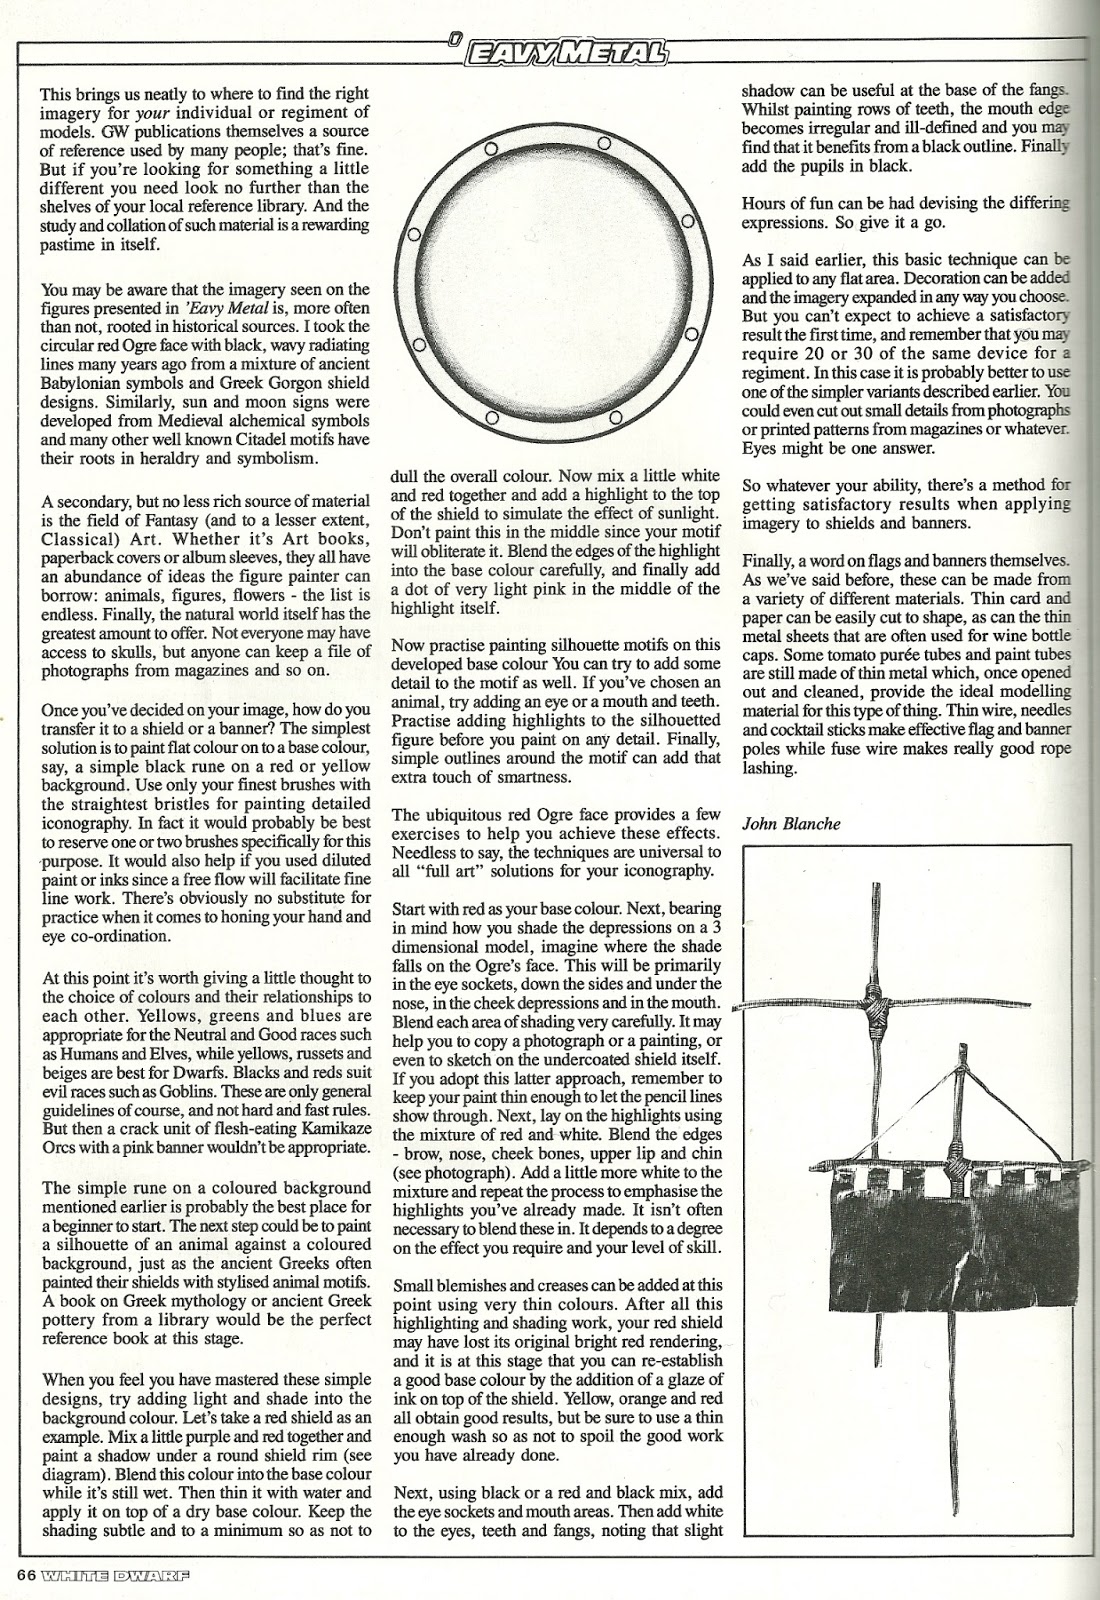
| Blanche and McVey hard at it. The famous stage by stage ogre face. Phil Lewis using cut outs from newspapers to create shields. |
The article goes on to showcase some of the varied and exciting shield designs that were knocking around the studio circa 1986, including some seminal work by the 'Greatest', Fraser Grey, not to mention Brian George and others. Even the StD chap with the 'Blut' banner (recently rediscovered by Steve Casey among the collection of the Mighty Avenger himself) makes an early appearance to inform the reader about how the rules of shield design can be applied to a banner.
 |
| A selection of shields and other designs by Citadel's Old Masters. |
As the article continues, we are presented with quite an informed discussion about the ethos of shield designs during the '80s, including a little comment about where Blanche drew his inspiration for the now famous ogre face design. It highlights the importance to search through historical references to pick out ideas that can be adapted, or even whole-heartedly stolen, from history. Almost as an afterthought, the piece ends with a paragraph about transferring the skills discussed onto large scale banners, and also includes an image on how to go about constructing them.
It was this little nugget that has left me contemplating how easy, or indeed how hard, putting together a old school style banner would be. I've experimented with a couple of things so far, mostly using plasticard, but found the results less than expected. The banners and their poles were often flimsy and unsubstantial, so it was something that I left unexplored as I got on with other things - namely completing my Third Edition Khorne Army. Now as this project is starting to draw to a close, for a while at least, it needs several character pieces to finished it off. Namely, the mounted chaos lord and his bannerman.
So a banner, painted in a similar style to the shields, would be required. In this post I hope to explain to you how I set about constructing my banner in the hope that it might inspire other Oldhammerers who haven't made flags before to try something new. Well, this is how I did it.
Materials Required
- A tin tube of food paste - tomato or garlic puree being the best.
- Heavy duty scissors
- Large spoon
- Flexible florist's or gardener's wire on reel
- 5mm wire in strands
- Superglue or epoxy resin glue
- White paint/Spray undercoat.
- Wet sandpaper or needle file

To start I emptied the tin tube of its contents, squeezing it out in the sink and washing away the remains to keep the wife happy, and brought the crushed tube to the table. Using my heavy duty scissors I carefully cut off the the top and the bottom of the tube, before cutting along one side. Unfolding the tube takes a little care, as the edges of the cut tin can be sharp. Once open and reasonably flat, I washed out the remaining puree in soapy water and left the metal to dry for a few minutes.

Then I used the spoon to smooth out the tin. This took a while and revealed just how important it is to squeeze out the contents of the tube in a systematic way. Use quite a bit of pressure and move the spoon in the same up and down motion until its is a flat as you can possibly make it. Don't worry about the odd wrinkle here and there as this makes little difference when the banner is painted. When the tin is as flat and smooth as you can make it, its time to start cutting the metal once more.

Even out the shape of the metal with the scissors, a good rectangular shape will be best. I did this by eye, as I am quite practiced at cutting shapes out my hand (years of being a teacher of young children) though you may want to measure this and score the shape on the tin with a soft pencil. Once happy, trim your sheet to the desired shape and add any additional shape that you may require, I chose two flaps at the top to attach to the bannerpole, though you could easily choose any number of these, or include battle damage or more. You could even bend the banner into a shape to suggest wind blowing through the material. It really is up to you and the sky is the limit here. I went for something simple for my first banner, you may well want to do the same. I added a plastic '80s shield for scale purposes so you can see just how big the banner is.

Your next job is to source your wine. A reel of soft wire (such as that the florist's or garden centre sell) and a slightly more sturdy straight wire. Cut your wire to the appropriate size and put to one side.

Use the flaps that you cut into the metal to attach the banner as I have shown above. Use this as an opportunity to get the shape of your banner correct and do not think about gluing anything down at this stage. Bend the flaps (you should find this very easy with the tin) over so that it grips the wire quite tightly. You should then be able to slide the wire free and move on to the next stage.

Get hold of your softer wire and coil it around the two wires that represent the bannerpole. This may be fiddly to start with but you should eventually end up with a nice tight join. Then carefully wind more wire over the top of your knot to create the impression of rope bindings. Snip off any unwanted wire as soon as you are happy with the result.

Then slide the bannerpole back into the banner itself, using the flaps you constructed early. Stick these down now with super glue or epoxy resin and wait to dry. While the glue is drying, cut a thin strip of tin from your remaining supply and stick this over the top of the pole that runs vertically down the back of the banner. This will create strength and stop your banner flopping around later on when it helps lead your old school Citadel to victory in glorious Third Edition battle.

Once the glue has dried, flip the banner over and clip off the wire that you do not want. I used my heavy duty scissors again to do this, though you could use clippers or a knife if you were that way inclined. You may well want to tidy up any rough or sharp edges at this point (use wet sand paper or a needle file) before washing the banner in warm soapy water and setting it aside to dry.

Once the banner is dry, its a simple case of undercoating it. I used a spray paint as I found it hard to get the initial layers of paint to adhere satisfactorily. Do a couple of coats, waiting for each one to dry first, before finishing. I noticed that the paint took slightly longer to dry than it would on a metal miniature so be careful not to get any fingerprints in the paint while you are doing this.
And so ends this little tutorial. If you have followed my instructions you should now be the proud owner of a sturdy banner. The beauty of this method is that it can be applied to any scale and any type of model, so you can easily transfer what you have to your historical or science fiction models.
Feedback is really important to me when I do a tutorial. Was I clear enough in my instructions? Are the photographs informative enough? Please contact me if you have any suggestions, or indeed, advice in the business of banner building.
I will be following up this article shortly with a guide to how to paint a design (the ogre face of course!) on to the banner as well as how to add those little extra details.
Until then, getting snipping.
Orlygg.
Brilliant and inspirational James, very easy to follow. Those banner pole ends are just crying out for severed heads and skulls! ;-)
ReplyDeleteHa! You are quite correct and I have a few ideas. Watch this space.
DeleteNice work... but don't wash food down the sink!!
ReplyDeleteIt was the food disposal side of the sink! Honest!
Delete:-)
DeleteI foresee fingers covered in plasters as I mess about with sharp metal.
ReplyDeleteI used to make banners from paper, but I can't really remember how! I think I 'painted' them with PVA glue so that they would hold their shape. They weren't very good, but then my painting skills were pretty terrible back then.
Been meaning to have a go at foil banners for a while - great tutorial!
ReplyDeleteGood tutorial. The only thing that doesn't make sense to me is what to do with the extra foil strip.
ReplyDeleteYou say: "stick this over the top of the pole that runs vertically down the back of the banner. This will create strength and stop your banner flopping around later on"
Maybe I'm just dense. Are you basically using it to "tape" the banner to the vertical pole?
Got it! It will really help the banner hold its shape and create a static plate on which to paint.
DeleteVery nice! The only part that was unclear to me is how you cover the banner pole behind the banner with the extra bit of foil. Wouldn't that leave seams?
ReplyDeleteI am currently working on a foil banner of my own. I used the foil wrapping from a wine capsule. I also have some toothpaste tube that I'm going to try to use, but these days those come with a plastic coating, so I'm not sure how it will work.
I too remember when making things yourself out of other materials was part of the "Games Workshop hobby". I usually made banners out of paper though, a lot easier to work with given my limited tools.
ReplyDelete