Showing posts with label Building Gaming Tables. Show all posts

Friday, 19 February 2016

The Crude, the Mad and the Rusty: Mini Gaming Table


Greeting all! What do you think of this? I built it yesterday afternoon out of a few scraps I could find lying around the house. It is a scale scenic playing board based on the battlemat published as part of the Crude, Mad and Rusty scenario I have been working on. 

As you know, I have just completed the selection of models that form the pieces in the game and felt like experimenting with the old ruleset to tweak things here and there. It gave me great pleasure to see Mr. Graeme Davis, one of the original authors, contributing to that particular blog post with some background detail about the development of the scenario - it is really quite interesting so pop back over to my miniatures post to check that out of you have not already do so. 

Now many of you will remember that I a fan of putting together cheap and lightweight gaming tables. I have posted about this before. Have a look at these articles if you are interested in my previous endeavours. Last summer, I produced a 'theme' board based on the first scenario for McDeath, Winswood Harbour. I thought that it would be fun to attempt another 'theme' board, this time for the Mad, the Crude and the Rusty - after all, the battlemat in White Dwarf 89 was shocking to say the least!

Let me explain how I built the mini-table you can see at the top of the post. 


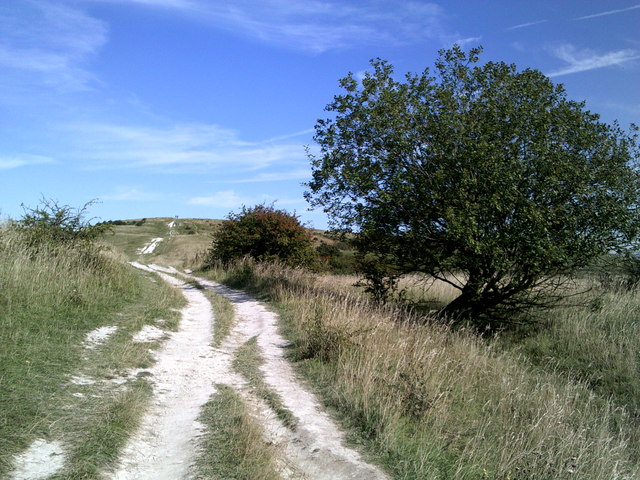
My first step was to cut out some foamboard to represent the brown areas from the original battlemat. Now, despite reading through the scenario several times I just couldn't work out what these areas were supposed to represent - so I went for slightly higher ground. I made sure that I used diagonal cuts with the blade to create a sloping edge to each piece of foamboard before sticking them on in roughly the correct places with Copydex. For the base I used a thick piece of plasticard, which by an incredible coincidence was exactly the right size for the battleboard and required no trimming at all!

You can see here that I used the original magazine to work out the dimensions of the foamboard cuttings. 


Copydex doesn't take long to dry, which is what makes it ideal for building scenery and fantastic for cardstock houses like you find in Warhammer Townscape. If you have never used this glue for model making I really do recommend buying a bottle and trying the stuff out. It is excellent stuff and quite reasonably priced too - I think I paid £4.50 for my large tub. 

Using PVA, I just painted on adhesive in rough strokes around the edges of the foamboard pieces and across the base of the plasticard. I rarely cover the whole surface of a gaming board with sand and prefer just to cover the areas I am going to keep 'exposed' so to speak. I dried this with the wife's hairdryer on the lowest speed setting. Shhh! Don't tell her! 


I used a black acrylic to basecoat the whole board and while it was drying I cut out a second piece of foamboard to act as base for the mini-table. I left about one inch around all of the edges. Placing this aside, I began dry brushing the board with my darkest brown shade and worked up in stages until this looked like this! 


Drybrushing complete, I slapped on the PVA once more, this time concentrating the adhesive over the flat untextured areas of the mini-board. I made sure that the glue was spread out in a fairly natural way, as nothing breaks that sense of immersion with a gaming board than poorly applied flock or static grass. 


With the grass stuck on, I again recruited the services of my wife's hairdryer to slowly dry the glue that held the static grass. Nothing beats leaving this to settle naturally, but I was working on a strict timetable of a couple of hours - I don't think you can tell can you?


The final stage saw me sticking the board onto the base and painting the foamboard black to create a defined edge. I also added some different shades of static grass in patches around the board, to help break things up a little. Gale Force 9 do some excellent seasonal tufts of scrub, and I opted to add a little selection of the autumnal stuff here and there to further break up the edges of the gaming board. You can see that I printed out the original title graphic too! 

Highlighting the larger stones in white was the final touch. Oh, apart from adding a miniature or two!


Now to think about testing out how the scenario works and implementing any changes that spring to mind.

Orlygg

Sunday, 26 July 2015

A Dark Deranged Structure: Building McDeath's Winwood Harbour on the cheap!


Hello once more, my friends. As you will recall, one of the challenges I set myself some time ago in regards to my McDeath project was a custom board on which to play each scenario. Unfortunately, pressures of life (not to mention rather grotty weather) held me back from achieving this goal. However, with a week to go until the Oldhammer Weekend I needed to pull something out of the hat in order to get the game put on at all. So with the knowledge about how to create a Wargames table for next to nothing, I set about creating a small skirmish board from stuff I found lying about the house. This blog post will show you how I did it. 

As you can see from the image above the two main components for the Wargames table were foam board and two pin boards. Both of these items are strong and more importantly, light and make an ideal base for the cost effective gamer who lacks storage space.


The second stage is two cut out the foam board so that the interior of the pin boards are totally filled. Careful measurement beforehand will ensure that the foam board you buy will fit the recess of the pin board. I used PVA glue to stick down the foamboard ad left the glue to dry overnight.


Once suitably dry, I used a felt pen (and the Winwood Garbour map in McDeath) to design the layout of the gaming board. I included a little coastal area to represent the sea, space for the village as well as the road, hills and playing field. I used the card buildings as a rough guide to what I wanted scale wise around the the village area. Finally, I cut out the foam board in the bottom corner to create a little depth for the beach. 


Sand is the familiar friend to many a modeller and I added it to the parts of the board that would require texture. In the past, I have covered the whole board only to end up never seeing my handiwork once the flock and static grass stages have been completed. 

To create some height I used some more foam board to create hills. From experience, nicely contoured hills look great on the table but are a bit of a pain to balance metal models on. As a compromise, I opted to use staggered stage hills inspired on the classic set up in Warhammer Fantasy Battle Third Edition. I just cut them out with my knife and glued them down along with the sand. 

Again, I left this overnight to dry.


I undercoated the board in brown paint and left it to dry in the sun. I have always been amazed how useful a good hot day is for building Wargames tables as a good thirty minutes outside can dry glue or paint rapidly. Any bits of paint that the sun's heat missed, especially around the edges of the hills, were finished off with the hair dryer. 

Using a white spray paint can, I gently undercoated the lighter textured areas of the board. I sprayed along the road and the beach area quite carefully and then completed a second coat along the centre of the path and the top of the beach. 


For the next stage, I mixed up some very watery paints. Using an earthy brown as a base, I created a darker shade, a mid tone (by adding a great deal of yellow) and a lighter yellow. These mixes are extremely thinned down and have a similar consistency to washes. 


It was then very straightforward to apply them. Using a large brush, I dabbed them on along the textured area and allowed the different tones to mix together, spending a little more time on the beach area and attempting to get the beach a little more sandy in tone than the roads. 


Strategic use of the hairdryer helped here too, and after a while the whole of the board was covered and dry to the touch. 


I drybruhed up the textured areas in much the same way as I do my bases. I used a mixture of brushes and tried to keep the directions of the strokes different. I ended up using a white for the final highlights. Be warned though, this process will kill your brushes! 


The final stage, and my favourite, was the flocking. I just coated the board in PVA and sprinkiled on my darkest green static grass. Over the next few hours, I added other tones of static grass to try and create a more natural feel to the surface. I also took advantage of the Gale Force 9 and Army Painter products I had hidden away. These helped me create patches of flowers, bushes and tuffs of high grass, all of which add character to the table. 


A quick test with the models and scenery and we are nearly finished. I just have to add the water effects to the beach area tonight. 


As a final touch, I painted the edges of the pinboard black to create some definition and tidy the table up. 

I am now all ready for the first game! 

Wednesday, 6 August 2014

Orlygg's Completed Wargaming Board


With the weather turning, BOYL just around the corner and the fact that the wife and I will shortly be taking the kids to Disneyworld for a few days I needed to invest some time today into completing the gaming board that I have been working on. If you recall, I was using materials that I uncovered in the garage after spending the day clearing it up last week. I had to buy a few pots of paint to get the job finished, but these cost no more than about £10. 

I spent the day weathering the road which had been left overnight to dry after being sprayed white. I mixed up a yellowy brown wash using my posterpaint, PVA and quite a bit of water and just dabbed the stuff over the white. This weathered the road surface nicely and brought the tones down alongside the soil elsewhere on the board. Once this was dry, I used PVA straight from the bottle to splodge and dab along the edges of the road to ensure that they looked more natural and overgrown. It edged the board with Duck Tape left over from an electrician's visit. 

What do you think of my efforts, eh?


The next step is to finish off the construction and painting of the buildings that will be used to create a little farming hamlet here. The little cottage you will have seen before and was built using Phil Lewis' old plans from White Dwarf. They other two buildings are variants on this design. The central model is ready for painting while the main farmhouse needs to be timbered and tiled. I reckon that I shall be building a few barns to give the place a rural feel before moving on to the fences and hedgerows. More on the construction and painting of these buildings after the Oldhammer Weekend. 

Tuesday, 5 August 2014

Orlygg Builds a Full Scale Gaming Table Part Three


Hello again everyone. It seems that the long run of summer weather we have been enjoying here in the UK is beginning to end. Rain is forecast in the next few days, and will no doubt persist until its time to return to work in September. Thankfully, I have made good use of the the power of the sun to dry much of my gameboard. If you have been following this project, you will know that the last time we spoke I had just finished the carving of the polystyrene I was using to create the surface of the board. Well, since leaving that to dry for a few days I coated the lot in PVA glue and covered the boards in sand (as can be seen in the photograph above) before coating the dried sand with a liquid wash of PVA to help secure the sand in place. 


Once this had dried out enough (only a few hours in the summer sun) I was able to basecoat the sand in a nice brown tone mixed up from the kiddie friendly paints I found in the garage. I even had a few chaos spawn appear to help me get the first coat finished! 


Once the basecoat was dry, I build up layers of highlights simply by adding yellow and white to the original mix. I found that by adding the yellow as well as the white the highlighted shade became more natural looking. For a while I pondered exactly what my board would look like but then I considered my materials. They were designed to show the chalky landscapes that I grew up on in Dorset and Devon, so I opted to create that style of surface. 


I used a spare piece of polystyrene to help mix up yellow and white in increasing amounts as I drybrushed the surface up and you can see the finished result in this photograph. I hoped to achieve a chalky clayey effect and I think I pulled it off, despite my limited materials. 


Packets of high quality German flock had resided in my garage for some time (though one was supplied by Stuart the other day) and they were just waiting to be used on a project. The colours would be perfect when recreating the type of landscape I was looking for. The picture below will give you some idea if you are unfamiliar with the area I am speaking about. 


In the future I hope to add further lines of static grass and flock to create that rutted, pathway look these paths have. 


I coated the entire board with PVA, save for a few areas that would remain dead and the crossroads I decided to include after discounting my river idea. I then sprinkled on the static grass starting with the lightest colour and working up to the darkest. I ensured that I mixed the colours somewhat to avoid that dreadful 'single tone of green' boards you see kicking about. Once dry, I stood each board up on end over a large plastic box and knocked off the left over static grass. I used about two bags to cover the whole board and easily reclaimed a bag's worth by doing this. Re-cycling static grass after a project like this makes good sense in my opinion. 


To create the chalk effect, I simply used an Army Painter can of spray to highlight the road surfaces. At the moment I feel like its too white, and should perhaps be darkened down with a yellow ochre wash but we will see how things look like in the morning. I certainly need to make the edges of the road more natural and less straight. I shall be using that mix of static grass I saved by tapping off the surfaces to do much of that. But considering I have spent practically nothing on this board I am pleased about how it its looking at the moment. What do you guys think? Any comments or ideas to share?


Wednesday, 30 July 2014

Orlygg Builds a Full Scale Gaming Table Part Two


Day two of my project to build a wargames table from the dross I have found in the garage. Yesterday, I found two old plasterboard pieces and a stack of polystyrene among other things and got as far as finishing the base of the first board. I was using the heat of the sun during the day to fast dry each stage of the board, which really sped things up. I was worried though that the wife might get a bit tetchy if the garden started resembling December with all the polystyrene bubbles, so I moved into the garage. 


Doing it old school, I used an old wallpaper table to balance the boards on and began to build up the second table. This time I caved in to the temptation of keeping things flat and even and added a few in situ banks (they are too small to call them hills) and a depression for the source of a natural spring or underground river. I coated the the first board in the builder's sand before covering it with an additional coat of watered down PVA. Leaving it to dry in the sun ensured that it is now rock hard. 


The second board has been left to dry before plastering tomorrow. I will tidy up the edges and ensure that once side fits smoothly with the other so there are no gaping chasms when the two sections are joined together. I am imagining that this is where the hamlet I intend to include will reside, close to the water source, and I have already got three buildings in various states to add when necessary. In my mind's eye, I would imagine that hamlet to be built up around a coaching inn, so at some point I am going to have to build one. Most of this will be plastered tomorrow. 


I have also done a bit more research into the inspirational table. I have discovered from various channels, that the board in question was built by The Duke, a Bristol based gamer from the 1980s who's tables where superior to anything GW had at the time. He was paid for its use in the WFB3 rulebook so the story goes!


Looking at the surface of the board, I can see that its been painted in a variety of colours and then had flock (again, in differing shades) sprinkled on top. I have lots of static grass so will be using as I am trying not to buy anything really at this stage. 


The creator of this fine table is even credited in the rulebook. I wonder who all the models belonged too? Anyone know?


Having caved in about having a water feature (I found a tube of GW water effects in the garage too) I will also be stealing the idea of adding a road. Here you can see that the road is made up of an unflocked painted surface. And this is something I am keen to emulate when the time comes. 


Plenty of lichen used on this board! I love the stuff, but find that it dries out quite quickly if you don't look after it very well. The key to using it well on a gaming board is, like many other things, all a question of where you position it. I have no plans for a ruined monastery at this stage. 


A hint for the future. Bushed made from wire wool? Rubberised horsehair? Its certainly not the brillo pad specials that I had built before.

Well, with today over, I hope to get a layer of plaster over that second board tomorrow and give it a good coating of sand. Once that is done, I shall move on to basecoating and getting the soil painted up. I don't have much paint about the house, so I might have to have a look about in the kids arts and craft sections at the local shop.

Orlygg.

Tuesday, 12 November 2013

A Dark Deranged Structure: How to make a mini gaming table for next to nothing!

Introduction

I have written about gaming tables before. And as others have said, the surface upon which the battle rages should in many ways be considered the 'third army.' But what do you do if, like me, you don't have the space for a gaming table? What do you do if you only have a few quid to spend, or a wife that insists that your hard earned cash is NOT to be spent on any more of those 'little men'? 

Well, you do what technology has been doing for a while now. You go mini!

Several people have asked me about my 'mini gaming board' since I started this blog eighteen months ago. I have always promised them that one day I would do a quick tutorial about how it was achieved. And here it is! Now I made this board quite a few years ago now, when my wife and I were just married and I had a whole room dedicated to miniature painting - it even had a spray booth! Sadly, two children have arrived since then and now use the rooms to sleep soundly in at night, but the board remains safely hidden behind a door. 

I wanted to build a board on the cheap. I had zero budget as the wife had banned anymore purchases. So I scavenged items from around the house. The basis to the table was the humble pinboard, as seen below, which cost an incredible £2 from the Range and I am sure that these things can be bought very cheaply in a wide number of locations. The one I used had lurked in the garage for some time. The one I am photographing is my wife's NCT one, so let's keep that a secret!!

How I made the gaming board


Once you have your pinboard, and they do come in a range of sizes, you need to waterproof the 'fake cork' substance that forms the basis of the board. I used super thin sheets of plasticard, which I think are 1mm in width. These were lying around in my house in bulk, though any waterproof material would do, such as tinfoil, clingfilm or cut up plastic carrier bags. The idea is to form a protective barrier between the soft pinboard and the wet PVA glue that you use to stick on the sand.


The picture below shows you how I set out the plasticard. I poured a conservative amount of glue down onto the surface and used this to stick on the plasticard. I found that using too much glue made the board rather soggy so do err on the side of caution when you are doing this bit. I used a small paintbrush to seal the edges of the board once the plasticard had dried to ensure that the more runny PVA mix that I use for the sand wouldn't seep into the pinboard itself. 


PVA is dirt cheap, unless you are buying it from a GW store, so always buy in bulk. B&Q is your friend here, on any other hardware store, and the glue I used from my table was left in the garage after a spot of decorating. I attached the sand in pretty much the same way as I do for my minis. Paint on a thick layer of the stuff, sprinkle on the sand and seal with a watery wash of PVA once the initial layer is dry. Be careful though, depending on the ambient temperature, your sand may take a fair few days to dry properly. As for the sand, I scooped it up from the local beach in two buckets. It was an easy job to filter out the larger stones and fag ends using the garden sieve. 


Once the glue is set its time to paint the board. I just used really cheap acrylic paint from Tescos that the wife had left lying around after making some Christmas decorations. A dark brown shade was used to cover the sand board, and once dry, I drybrushed over with a lighter shade (I just added white) making sure to leave no piece of sand without a good coverage. Again, I waited a fair few days for this to dry. Despite my precautions, the board did bulge a tiny bit and weighed a great deal more than when I started, but it was not noticable. One word of advice, remove any metal fittings at this point. They are usually on the back of the pinboard to help hang the board on a wall and they can really scratch a table. 

Then just add flock, which if your anything like me, you already own in abundance in your modelling stash anyway. 


The finished surface is really useful for taking pictures of your miniatures once they are painted. As can be seen here. 


As you can see below, the average pinboard sized battlefield easily accommodates this Realm of Chaos warbands clash. Dan and I have fought many, many battles across this board and though its not suitable for every type of unit, for small scale infantry skirmishes its ideal. 


Conclusion


This board has served me well over the last four years. Its small enough to transport, light to move and very easy to store. If I was to build a second board I wouldn't change the design at all. I would probably use plastercine or cavity filler to remove the edge of the pinboard though, and sand over the border so it is possible to fit two boards together and make a larger battlefield. Actually, now that I mention it, that is what I shall do when I build my full scale battlefield next year. 

Well, I hope this article has answered all the questions that you readers have made about how I built the table. If you are after more clarity, please do email me or comment below. Additionally, if you have a killer tip about how to make a wargames table very cheaply, or know of a useful link, please do share it below. 

Thanks!

Orlygg.

Saturday, 16 March 2013

'Oldhammer Style' Games Tables: A Lesson from History?

I recently posted some images from Marcus Ansell in which he shared with us the tables they are amassing at the Wargames Foundry for gaming sessions. They are typical of modern, contoured boards and certainly look impressive, especially when compared with my tables of yore - a few books with a grass paper mat rolled over the top, lumps of lichen for bushes or trees and cut up scouring pads for hedgerows. 

Oldhammer has its roots in nostalgia, there is no argument there. Some sceptics may suggest a fresh rose tinted haze about fantasy gaming's past that cannot be compared to modern, CAD designed models and scenery, but that is missing the point, and also, as you will see, completely untrue.

One thing that 2000pt two player gaming and the growing commercialisation (particularly by GW) of scenery  itself has created, are fairly unambitious wargaming boards. They're fit for purpose of course, but that purpose is to accommodate fairly small plastic armies fighting armylist influenced non-narrative games. These boards are often as soulless and ubiquitous as the miniatures, rules and armylists themselves 

Sadly, this has even crept into historical gaming, though some wargaming groups and manufacturers buck the trend...

Such as...

Corunna at Salute 2012 by Essex Gamesters - a worthy show winner. Just look at the ambition and scale of this game!
The game came complete with a finely modelled town and dock.
The size and shape of the table blew me away when I saw it - as did the attention to detail, just look at this frigate!
You can see that the Essex Gamesters worked together to create something incredibly impressive and ultimately show stopping. 

This must be the future ambition of the Oldhammer Movement, surely? If Thantsants can create something as astonishing as his Orc's Drift set up on his own, what could we produce all working together as the Gamesters did? Perhaps a self developed scenario such as those under discussion here?

Thanks to Nico (he of the marvellous paint job) we now have some proper Oldhammer inspiration to draw upon, namely, old school tables produced in the '80s by gaming groups to play Second and Third Edition Warhammer on. 

Check these out!

The Player's Guild Games Table from Games Day '86
Another example of the Player's Guild and their '80s wargames tables. This one looks like its got space for the entire Warhammer Townscape building collection!
A colour photograph if the '86 table from the other direction.
A section of the famous WFB3 games table.
Now compare what you have seen to this, a table created with cutting edge technology nearly 30 years later...


The difference is simple. The larger boards have been created by larger groups of gamers who want a memorable experience and who are willing to put a great deal of time and effort into scenarios, miniatures and scenery. The smaller boards are for simplistic unambitious 'cleanse and burn' style gaming among two rather small (but shockingly expensive) armies where the emphasis is that everything is done for you and can be bought off the shelf. The battlefields would look much the same in gaming clubs from London, to Washington D.C to Sydney. 

Highstreet gaming at its most banal!

Don't get me wrong, there are some outstanding and remarkable tables out there, many of which use the products described above, but these are, sadly, few and far between. If the Oldhammer Movement is going to one day do a show and start promoting the ethos publically, we must follow the lead of our WFB3 playing forebears and produce a table that does the fantastic miniatures that we spend so much time collecting and painting, total justice.

Opinions?

Orlygg.