Half-term just flew by. We've got a fair bit achieved inside the bungalow too, mostly stripping away layers upon layers of ancient wallpaper from the lounge and corridor. Everything was papered it seems, and then painted over in thick, 1970s and '80s house paint, ceilings included. With the new bathroom due to be fitted the week after next, and new flooring and plasterwork imminent after a window replacement... it is full on (and expensive) at Orlygg Towers.
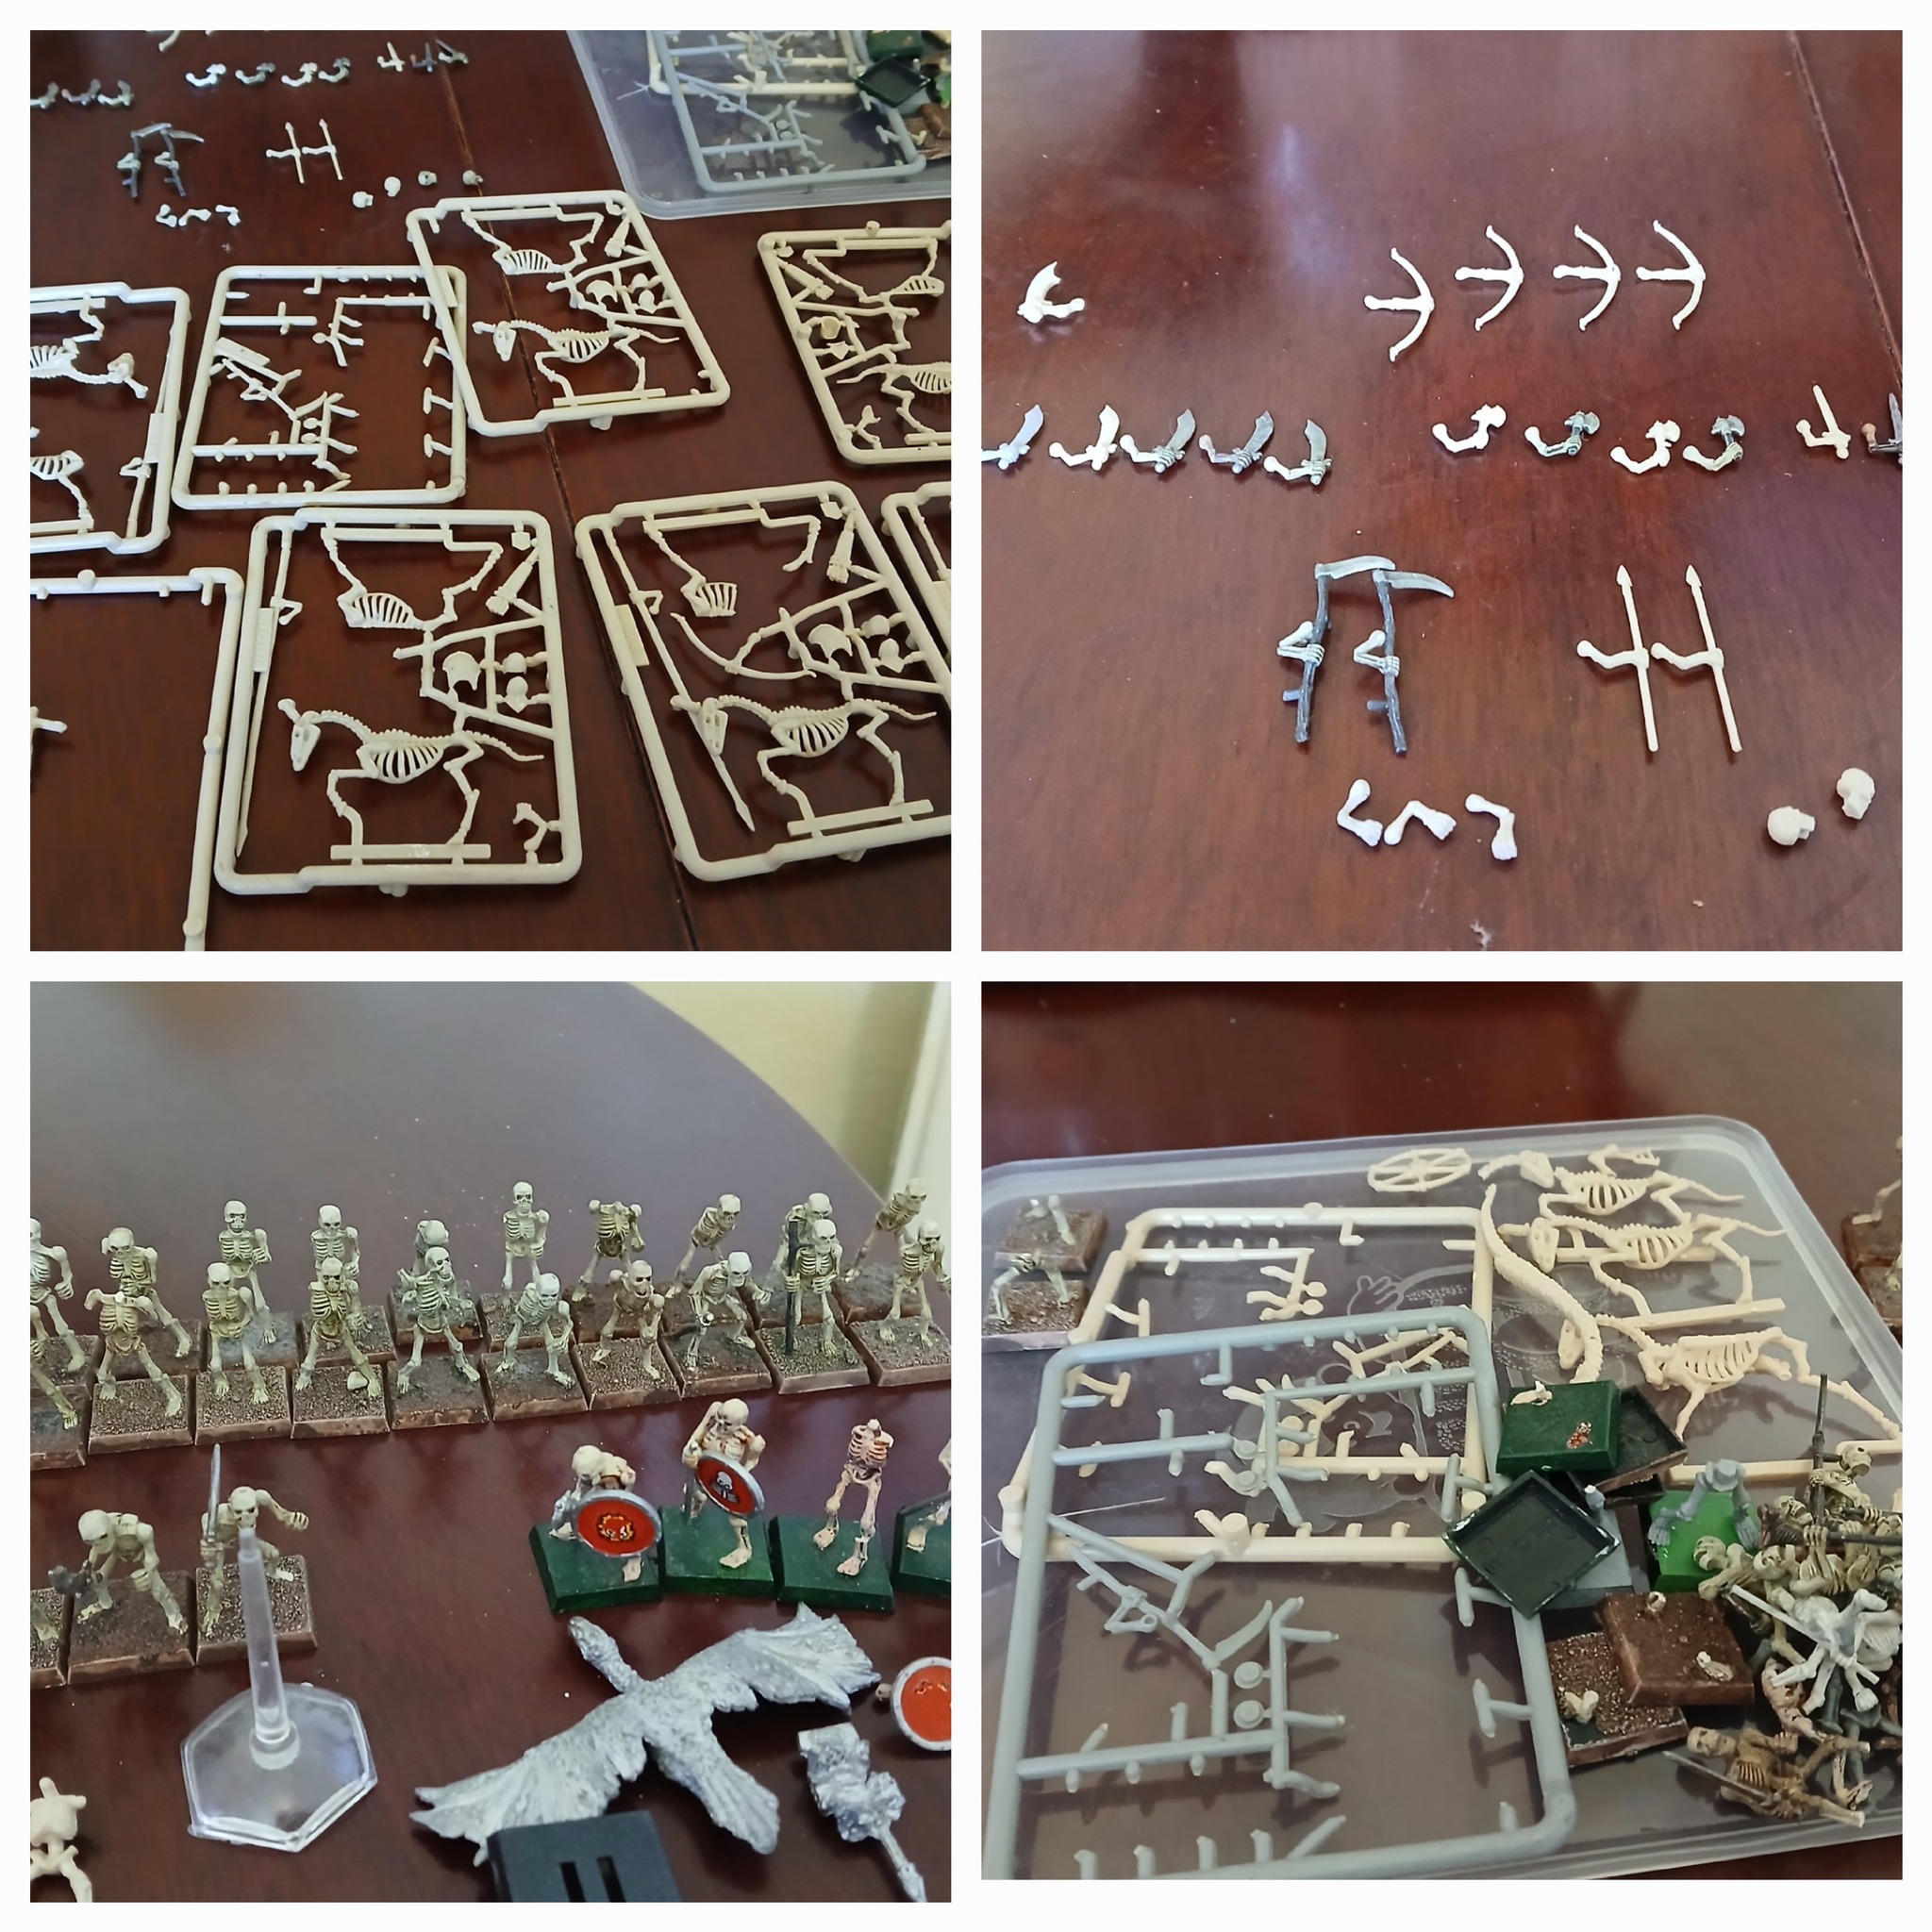
As you can see, I still found time to work on the Skeleton Army project. The two models you can see above are my test pieces now that all thirty infantry models have been fully restored. And what a job that was! As you may have seen, many of these models were snapped or damaged in some way with nearly all of the weapons missing. I think I counted five complete models in the entire assemblage.

Many of you dear readers have supplied me with bits of plastic skeleton or complete frames over the last few months. Every donation has been carefully put away and used to rebuild this magnificent regiment. I've even had a go with the infamous plastic skeleton armour pieces to create a skeletal champion to lead them. I used a mixture of poly-cement and greenstuff to repair splits and breakages, going as far to sculpting simple joints on the shoulders of those models who lack them. A pin-vice was handy to drill out suitable holes here and there to affix to my armless skellies.
Oh, and the sprues I built up for the Skeleton Horde remain unused, so the Horde models will too see the light of day eventually.
The hodgepodge of materials means that my army is a little lopsided in regards to arms. I have far more scimitars than I do anything else and only two spears. Not that you can notice once the models have been assembled and ranked up. I must confess to being impressed with some of the posing done by the former owner, very dynamic. Inspired by this, I set about wherever possible having plenty of swords and axes in the air or shields held out in front as if preparing to receive a charge.
After a few days of tinkering all of the models were repaired. The next pressing concern was the shields. Did I have enough for a project of this size? A good rummage through supplies found that I'd barely meet the needs of my troops. Beyond bankrupting myself purchasing old shields on eBay for £7.99 for four I would be limited in scope.
But, I'd found an old press mould kit in the attic. I'd barely used it back in the heady Oldhammer days of my old life so thought, 'why not try and see if it is possible to press mould some of my favourite old plastic shields?'

The mould itself was bought on Amazon a long time ago. It is activated by hot water. Simply boil the kettle, drop in the material and wait a few minutes. The mould becomes very, very soft and easy to manipulate. I used the back of a spoon to roll the stuff flat and level before returning it to the hot water. I then selected a few suitable '80s shields, scooped the mould out, laid it flat on an old coaster and pushed the shields into the material. Not too hard mind, I found the a slow, gentle bit of pressure got the best results.

I trialed a few different methods that can be seen here. First up, PVA glue. I simply poured the stuff over the impression and left it to dry in the sun. I repeated the process three or four times over a day or so and the first few shields you can see above in white were the result. Too brittle for our purposes really, and I found the the glue curled as it dried. Next up, I experimented with new fangled 'air drying clay' from one of MFM's kid's craft sets. Lovely detail on some of the shields bit it was quite brittle and hard to cut. The small elf shield on the bottom row was the most detailed of this run. I was expecting the clay to be hard and smooth when cured but it was actually just a kind of foam. This stuff could be useful for other projects, just not with these shields.
Finally, I reverted back to greenstuff. Initial experiments where far too thick, as can be seen with the top row, but over time I realised that less is more when creating these kinds of press moulds. I'd roll a little bit of putty, wet the inside of the mould and just push down hard. Detail was often lacking until I really worked the putty in my hands and run it under a hot tap. The greenstuff was then very elastic and made the clearest casts, as can be seen above next to the original shields. Nail scissors and a sharp blade made short work of any unwanted greenstuff.
I'm pleased to say that the two test-piece skellies in the first photographs both have my press-cast shields on them. Can you tell the difference?
And does this make me a recaster now? (;

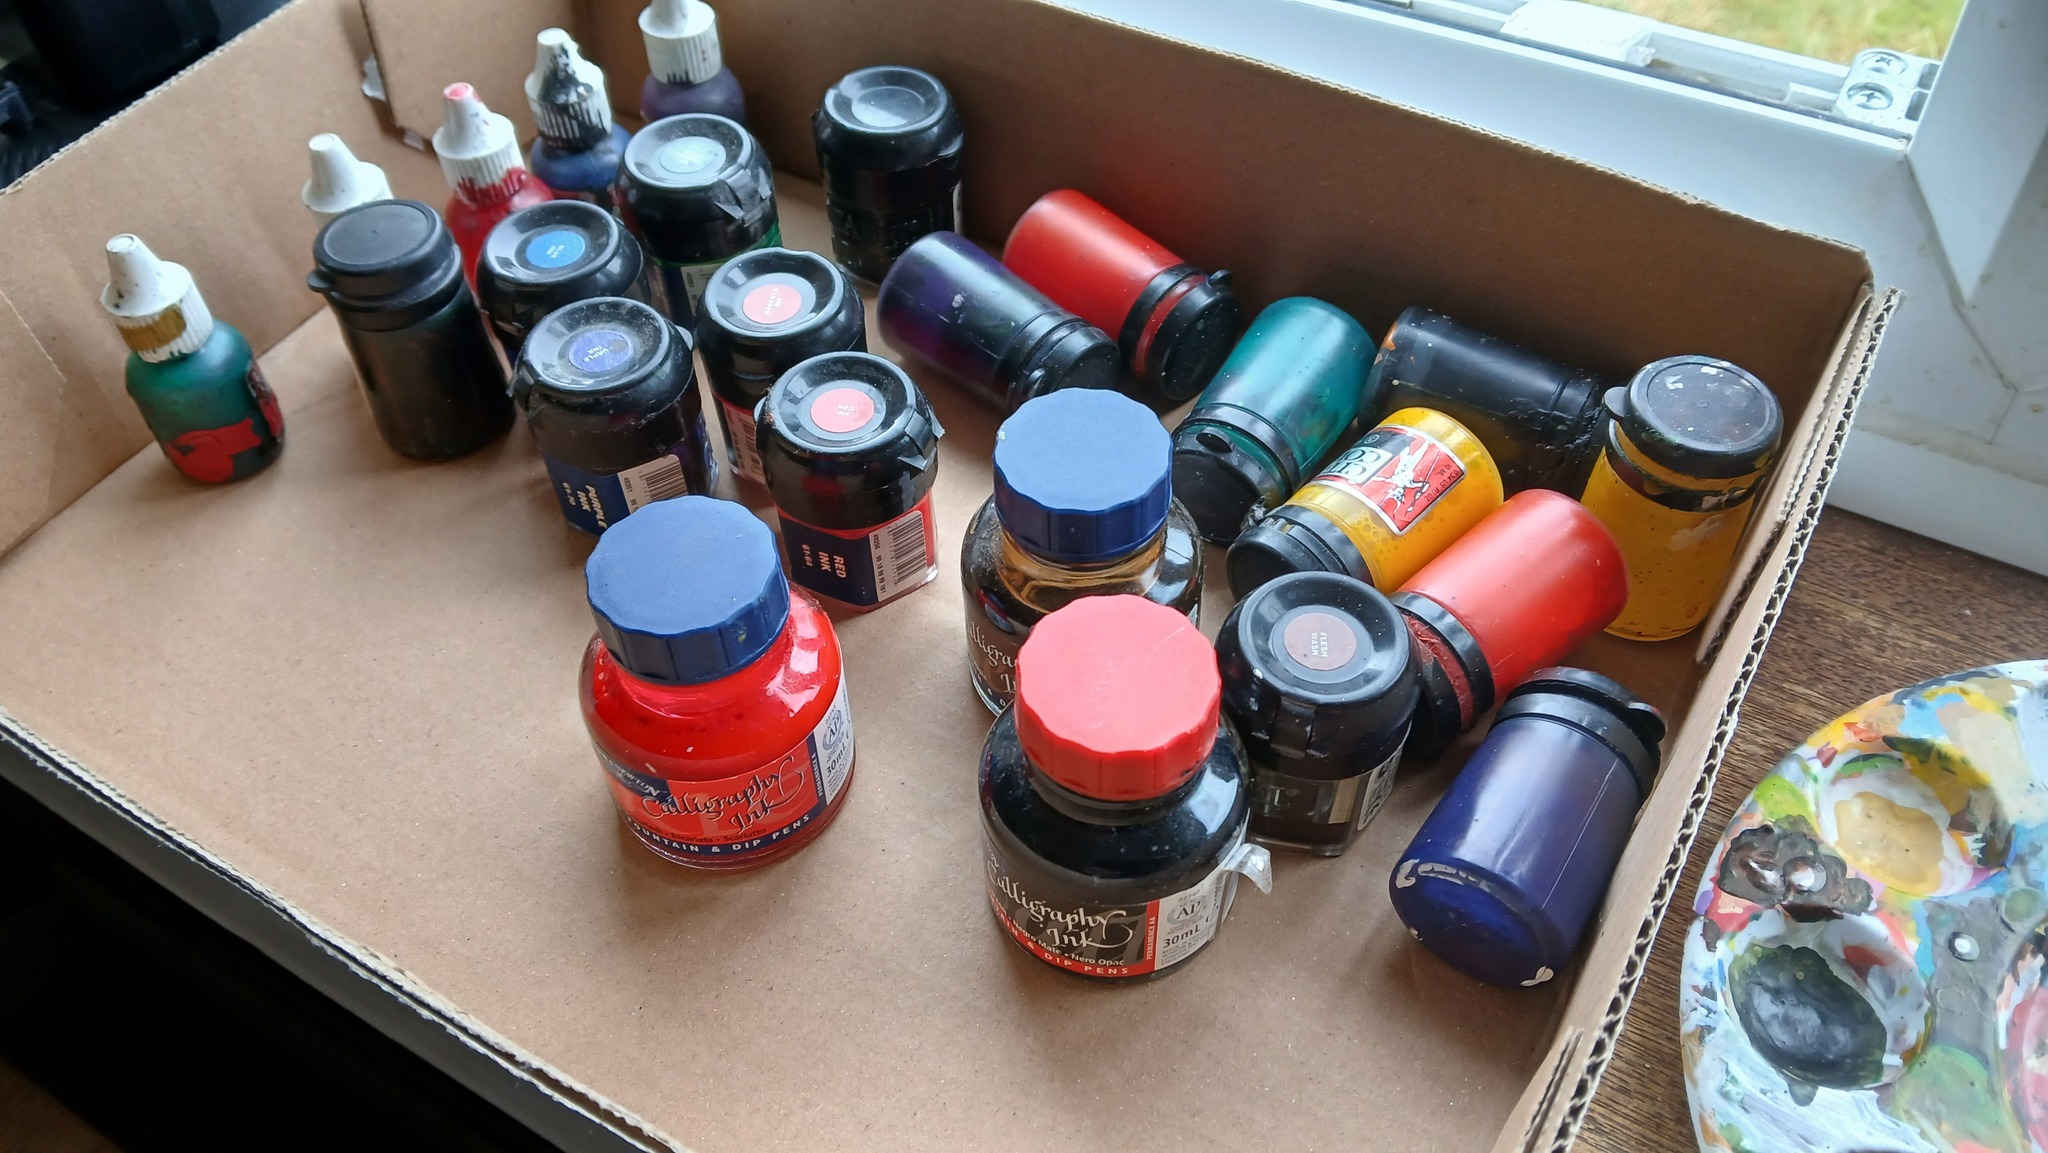
Here are the two restored figures alongside a skeleton a did a few weeks back fresh from the sprue. I've kept the painting method the same only I now drybrush on the ribs. I have way too many models to painstakingly paint each chest and it seems to work well. I'm no longer using the old Citadel Brown Ink to shade either, instead I'm using the Windsor and Newton Sepia I mentioned last post. With the metallics, I've experimented with some of the other inks to try and create a orangey rusty effect on the shields and weapons too.
The next stage in this project is to get a few more test models complete to really refine the process. Then I've got to basecoat the new arms and skulls I've taken from pure sprues. I'll be using Orc Brown to do this. I'll then wash the lot of them with sepia ink in one go. Then its just slugging on with the painting of the remaining twenty-eight figures.
With an inexhaustible supply of shields to paint now, I'll be cutting down on the monotony playing around with some new designs, including an attempt to reimagine some of the actual shield designs painted by Colin Dixon et al back in the 1980s. Of course, I still have a fair few metal figures from you kind readers to get distracted by too.
Onwards,
Orlygg